NVH Testing and Analysis Solutions for Motorized Assembly Manufacturing
One of the leading issues affecting customer satisfaction for motorized assemblies is unwanted noise or vibration. Some manufacturers rely on subjective testing of their products, having workers listen to or feel for anomalies. Others struggle to move it from the lab into the manufacturing environment. Sciemetric’s approach to sound and vibration analysis brings noise, vibration and harshness testing (NVH) onto the production line and enables the application of a more reliable, data-driven measurement to catch those hard to find clicks, whirs or buzzes. Our in-process test and monitoring solutions automate NVH testing, reducing the reliance on personnel while providing full traceability.
Contact us about your application
Using noise and vibration analysis to catch more than just noisy assemblies
Sound and vibration testing is most often used to identify and prevent noisy assemblies, but it can also be used for other applications to ensure a quality process.
Take snap ring verification, for example. This application requires the confirmation of distinct ‘click’ events as each snap ring is seated into place—but they occur within milliseconds of each other and are too quiet for the human ear to hear on a loud assembly floor. They are also often not accessible to a machine vision camera.
Sciemetric cuts the cost, boosts the traceability of NVH testing
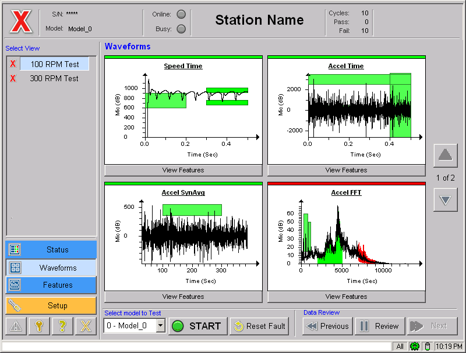
Sciemetric’s sigPOD in-station process monitoring and data collection platform relies on digital process signature analysis to reliably evaluate the quality of an assembly. Though a microphone can be used, with an ICP-based accelerometer the sigPOD will provides accurate analysis even under noisy conditions. From verifying rotating machinery and motorized assemblies for unwanted noise and vibration to resonance testing, our approach to NVH noise, vibration and harshness testing can identify root causes such as:
- Loose, rubbing, or missing components
- Valve noise
- Surface defects
- Misalignments
- Cracks
- Gear noise and defects
sigPOD reduces the costs of NVH testing, while also making it data-driven, repeatable, and traceable.

Advanced insight into NVH testing with digital process signature technology
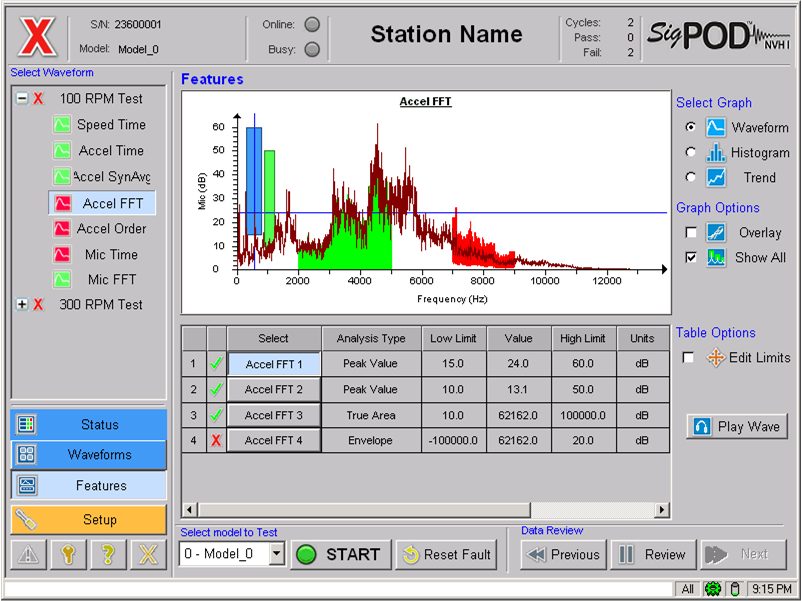
The key to the sigPOD’s advanced measurement is the application of digital process signature technology. A range of signatures are used to derive a pass/fail decision in production line sound and vibration testing:

- Vibration (using an accelerometer)
- Sound (with a microphone)
- Electric current
- Time domain, FFT
- Synchronous math, statistics
- All signature data is stored by serial number
Contact us about your application
Sound and vibration in manufacturing: Application stories
Noise and vibration testing are used across various industries to identify product defects and maintain consistent product quality. Examples of common testing applications include:
- Automotive/Off-Highway: Noise vibration and harshness automotive testing is used in assemblies such as motors, engines, transmissions, axles, HVAC assemblies, windows, sunroofs, seat tracks, gear quality, brake pads
- Small Appliances: Kitchen stand mixers, food processors, garbage disposals
- Large Appliances: Washers, dryers, dishwashers, air conditioners
Finding noise and vibration defects on a noisy factory floor
Noisy actuators were causing issues for a manufacturer of automotive seat tracks. The preference was to have the test done in-line, but the background noise of the factory made the use of a microphone a challenge. It seemed the only option was a quiet room or anechoic chamber. Read the application story to see how the sigPOD was deployed in production to find the noise-related defects.
Read more sound and vibration application notes
Learn more about how data-driven NVH testing with sigPOD has been used to:
Contact us about your application
Noise Vibration and Harshness (NVH) analysis: take production test data one step further with Manufacturing Analytics
With Sciemetric’s manufacturing analytics software and data management suite, you can save the data from your tests and use it for traceability and continuous improvement.

We enable faster issue resolution and the visibility today’s manufacturers require to:
- Identify the root cause of defects or issues affecting throughput
- Fix tests and processes for defect avoidance
- Very quickly pinpoint affected parts to avoid a mass recall or stop ship
- Continuously optimize stations by using the data to set limits, cycle times, etc.
- Demonstrate conformance for each part
- Aggregate data from across stations to eliminate data silos


