Products are failing on your production line. Productivity is suffering as yields drop and the cost of scrap and rework climbs.
You’re relatively confident that all the faulty units are being caught, but because your quality assurance process relies on a simple pass fail based on single data points like “max force” or “max leak rate,” you have no way of quickly tracing the root cause. You can’t even be certain which failures are in fact defective parts versus test malfunctions.
So you lean on the side of caution and pull hundreds, if not thousands, of units to avoid passing a defective product on to your customer. This takes a sizeable bite from your bottom line.
SPC vs. process signature analysis
We see this scenario time and again with manufacturers that rely solely on SPC (statistical process control), to manage quality. This century-old methodology tracks only isolated values, like torque and final spindle angle. It relies on statistical tools to monitor trends in production parameters to spot deviations that may eventually result in rejects.
While this can help production engineers identify potential problems early, it doesn’t provide much insight into what is actually causing the problem in the first place.
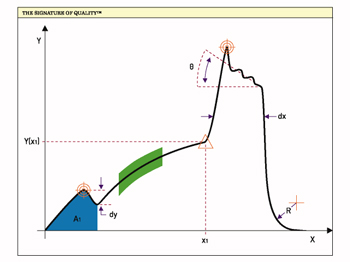
But if you use signature analysis to capture and interpret the entire waveform generated by the process, instead of looking at only a few isolated data points, you get a complete picture that reveals the “how” and “why” of decreases in yield. This applies to any controlled process on the line – from press fitting, to leak test, rundown, weld and liquid dispensing.
Benefits of process signature analysis
Beyond a simple pass/fail, signature analysis captures and visualizes hundreds of thousands of data points per cycle, for rapid insight and resolution.

Instead of days or weeks wading through piles of spreadsheets, you can find what you need to take corrective action in just minutes or hours.
You can easily distinguish a part failure from a test malfunction, spot anomalies that require further investigation, pinpoint where problems occur during the process, even optimize your test station by understanding how you can shorten the test.
Best of all, you have complete traceability right down to the specific parts and their serial number. Track down a few dozen defective units without having to scrap, rework or recall thousands.
For example, an automotive manufacturer was experiencing electronic throttle failures at the end of the line engine test – a time at which it’s expensive to address. By using signature analysis, the manufacturer found the two reasons for the failures and fixed the upstream process issues to eliminate them. It was also able to run the criteria against quarantined parts to determine which exhibited the same factors. The result? A 1.27 per cent failure rate was reduced to 0.07 per cent, increasing yield by 170 engines a month.
It all comes down to cutting manufacturing costs, increasing profitability and adding fresh shine to your organization’s reputation in the marketplace.
Use SPC as you always have, to monitor and track the health of your production line. But when problems arise, trust in signature analysis to quickly find and address the root cause.

